Alright, Here We Go
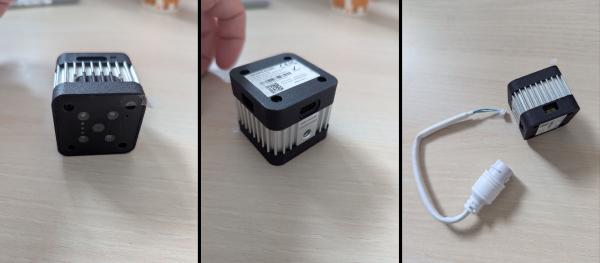
I got my hands on the Re:Camera from Seeed. Essentially, it’s a small box (a cube about 4 cm per side), wrapped in a heatsink. Inside, there’s a dual-core RISC-V based MPU (updated: only one core is visible to the system, the second one is apparently reserved for special operations), an ancient 8051 microcontroller, an OmniVision camera sensor, LEDs for illumination, Wi-Fi, BT, and, you know, all sorts of peripherals. RAM is a bit scarce, only 256 megabytes, so getting Greengrass on it will be problematic. You can connect Ethernet via a special dongle-adapter that barely stays put, but for development, there’s no point, because the camera shares its network over USB type C, and it’s easier to work that way. If you’re short on storage (and the device comes in 8 GB and 64 GB built-in storage options), you can stick in a MicroSD card. You can also stick the box to something metallic, as it has magnets on one side.

When connected, you can open a web page (192.168.42.1 by default), which, initially, don’t let you do anything except for providing access to the network setup and updating the system. There’s also a console there, but who in their right mind uses a console in a browser when you have SSH?
I suppose you can do something with it in its current state, but the manual insistently suggest updating via OTA, which I did (as obvious as it sounds, you need to set up the network first for that). After 5 minutes of active LED blinking and the device connecting/disconnecting from the computer, it granted me access to an updated page and required changing the default password (recamera/recamera). Changing this password also changes the SSH access password, so be careful.
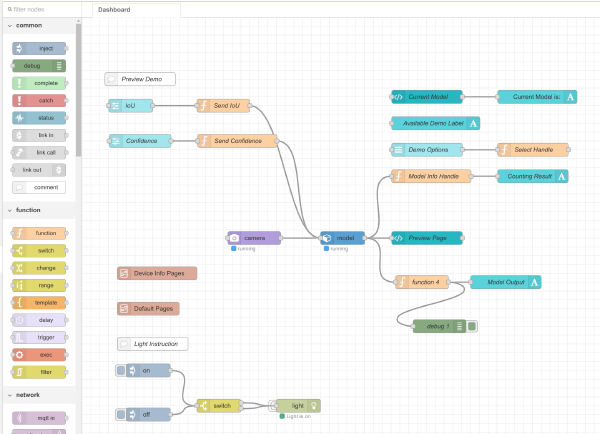
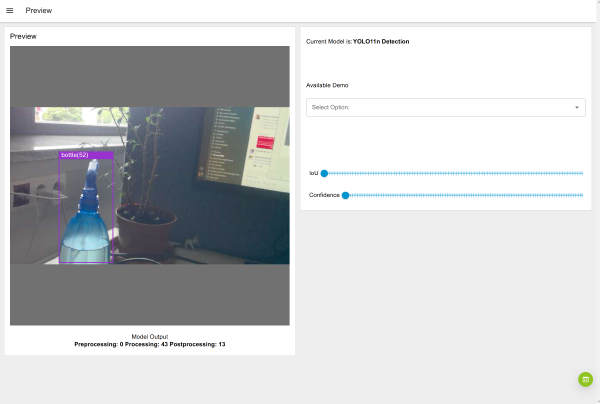
After the update, you get access to Node-RED, a sort of graphical development environment where data flows are described by graphs with processing nodes. By default, such a graph is already loaded and gives access to a simple dashboard that lets you see the camera image and the results of the YOLOv11 AI model. Other graphs can (in theory) be grabbed from Seeed’s SenseCraft AI website, but it requires registration, so I couldn’t be bothered.

About the Camera
The sensor installed in this box is frankly outdated. It’s an OmniVision OV5647, a 5-megapixel camera with a rolling shutter. Just recently, I was working on a demo with an STMicro BrightSense sensor, equipped with a global shutter, which captures information from the entire matrix at once, not line by line like this one. This affected the resolution (only 1.5 megapixels), but on the other hand, it captured fast-falling candies perfectly. You can read about all the “joys” of a rolling shutter on Wikipedia, but in a nutshell, if you’ve seen how they beautifully depict things getting sucked into a black hole in movies, well, that’s it. Seeed promises that other sensors can be connected and that they’ll release new versions in the future, including one with a global shutter camera, but for now, it is what it is.

Why is it important to have undistorted objects? Because of the model. Which we’ll get to now.
About the Model
Well, not quite. First, about what it runs on. The little box has an NPU rated at a whole TOPS. When using 8-bit quantization, of course, it can’t do floats. I haven’t yet figured out how to optimize anything for this NPU, so for now, performance can only be judged by the data available on the built-in dashboard.
The model used there, Ultralytics YOLOv11 in its smallest variant (n, i.e., nano), can detect and output bounding boxes for 80 different classes of objects, like giraffes and toothbrushes, which doesn’t really fit most real-world tasks, so the model needs to be trained on your own dataset. But the performance is quite decent; the demo provides the following data:
- Pre-processing: 0 ms. Now that’s great; apparently, the camera can output results directly in a format the model can take. In the demo I mentioned, such a setup didn’t work, and I had to tinker quite a bit to optimize it.
- Inference itself: ~50 ms. Not bad, not bad at all.
- Post-processing: 20–25 ms. This is where the Non-Maximum Suppression algorithm runs, which is quite resource-hungry, and it seems to be running on the CPU, judging by the load in
top.
So, all in all, this gives us something around 12–13 inferences per second, which is quite tolerable for many tasks. In the UI, however, it visually looks like 4–5 frames per second, which might be due to a non-optimal pipeline or other overhead.
With all this going on, the little box gets pretty warm.

What’s (Still) Off-Screen
If we’re talking about using this for something more serious than playing with built-in demos, we need to figure out:
a) How to build the system. I doubt Node-RED is suitable for production tasks, so you’ll need to roll up your sleeves (Buildroot, by the way) and shoehorn in the software we need.
b) How to optimize the model and run inference from our own programs.
If I have time for this, I’ll come back to it in future installments. But for now, catch you later.